")
Step-by-Step Guide to AC Installation

Your air conditioner is an important part of your home, helping to keep you comfortable in the warmest months of the year. If your current AC has seen better days, you’ve probably started thinking about replacing it with a better, more efficient system.
How do you choose the right system for your needs? What are the benefits of professional AC installation, and how do you prepare your home to install a new air conditioner? Learn the steps involved in placing, installing, and testing a new AC, and find out what’s involved in ongoing maintenance with our AC installation guide.
Step 1: Assessing Your Cooling Needs
The first step when upgrading your air conditioning system is determining what you need from a new unit. Many factors must be considered. Do you need a window-mounted unit, a split system for multiple cooling, or a built-in whole-house solution? How much cooling power does your AC need to work effectively without using excessive (and expensive) power?
This first step is more complex than it may seem, so it’s usually best to leave this cooling assessment to a professional. They’ll use their specialized knowledge and on-the-job experience to help you find the right air conditioner for you.
Step 2: Choosing the Right Air Conditioner
Once you’ve determined your needs, it’s time to choose the perfect air conditioner. Your AC expert will help you select a unit well-suited to your space so you can get the best possible performance without compromising energy efficiency. Once you’ve chosen an AC unit that strikes the right balance between savings and comfort, it’s time to prepare to install it.
Step 3: Preparing for Installation
Follow AC installation best practices to ensure a safe, efficient, properly functioning air conditioner. First, you’ll need to remove the old air conditioning unit. This process involves several complex tasks that require specialized knowledge, including:
- Safely removing all refrigerants (by law, this can only be performed by EPA-certified personnel.
- Covering floors and furniture to protect them from debris and damage.
- Removing the air conditioner and properly disposing of it.
- Inspecting the home for sealant leaks, which compromise AC performance.
- Identifying and repairing air duct leaks.
Your old system’s two copper refrigerant lines can be thoroughly cleaned and reused, but it’s more common to replace them entirely. This means first removing them from underneath floor joists, within ceilings or walls, or from underneath the ground.
These steps all have to be completed before installation of the new air conditioner can begin. From here, your AC installation professional will prepare the space for the new unit. This includes placing a pad for it to rest on and, in some cases, leveling or raising the ground to ensure a flat surface. The air conditioner shouldn’t be moved after installation, so getting this step right is important.
Step 4: The AC Installation Process Explained
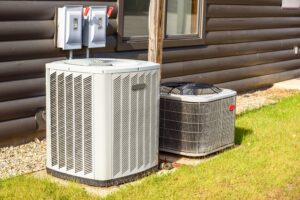
With the old unit removed, the ground level, and the pad in place, it’s time to install the new AC unit, starting with the outdoor AC unit. The AC condenser is placed on a composite pad outside and connected to the new unit’s service valve, which is done by brazing or welding leak-proof connections into the copper line set. This step keeps the refrigerant and the outdoor condenser separate from the indoor AC coil. Finally, the filter drier is installed in the condenser to filter air and absorb excess moisture.
The next step is installing all wiring and safely connecting your entire AC system to power. Working with high-voltage electricity should be left to a professional because all AC electrical connections must be installed following the National Electrical Code (NEC).
Then, the indoor evaporator coil is installed at the correct position near your home’s furnace heat exchanger. It’s connected to the existing metal plenum and rails, which keep it at the optimal distance from the furnace. The suction and liquid refrigerant lines are installed and secured to beams and ductwork every four to six feet with plastic or copper strapping. These connect the air conditioner to the outdoor coil to allow a steady cycle of refrigerant.
Another important central air conditioning installation step is installing the thermostat. This step will be more complex if you need multiple thermostats or want to install a smart thermostat.
The final step of this HVAC installation process is a condensate drain line, which runs from the evaporator coil to a floor drain or condensate pump. The drain line redirects moisture away from your home while the air conditioner is running.
Step 5: Testing and Ensuring Proper Operation
When the above steps are complete, it’s time to test the unit to ensure proper operation. Your AC tech will run air through the system for around 20 minutes. The air may be warm at first, but it eventually begins to cool as intended. During this test, your technician inspects the system’s operation, thermostat readings, and more to confirm that the unit is working normally.
Step 6: Post-Installation Maintenance and Tips
With your new unit installed and fully tested, you’re ready to enjoy cool temperatures at home, even in the hottest weather. However, regular maintenance helps keep your unit working properly, efficiently, and safely. Here are a few tips to help:
- Change air filters regularly (typically every one to three months).
- Regularly clean your outdoor condenser unit.
- Clear drain channels regularly to prevent clogs.
- Routinely check window seals to avoid leaks.
- Get professional AC inspections and maintenance once a year.
If you’re dealing with a problem with your air conditioner, contact an AC repair professional. Attempting to fix AC problems yourself could result in damage to your system, your home, or yourself.

Enjoy Efficient Cooling With a Properly Installed AC
Installing an air conditioner is a complicated task for the average person. Many components are involved, and the process requires several specialized skills, from welding to duct repair to electrical work.
Luckily, the qualified AC professionals at Kliemann Brothers are here to help. You can count on our skilled HVAC technicians to install your new unit with the utmost care in just four to eight hours. Contact us to start enjoying efficient home cooling today.